Course")
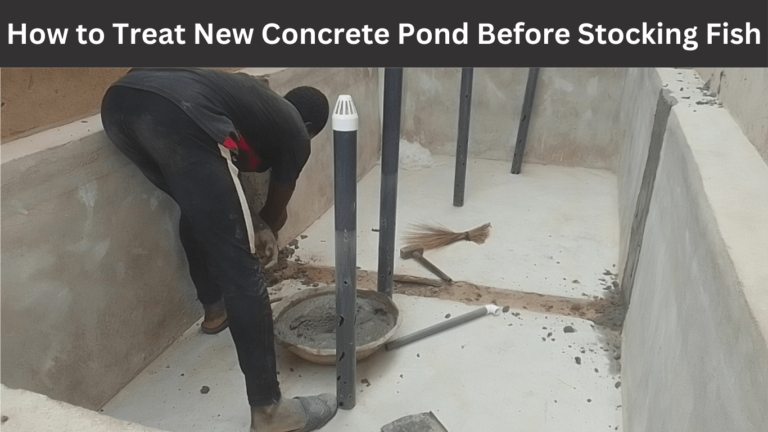
How to treat new concrete pond is important for every fish farmer or aspiring fish farmer to know before constructing a concrete fish pond. This is because new concrete ponds leach harmful substances like lime and have high pH levels that can be detrimental to fish health.
Proper treatment of a newly constructed concrete pond is essential to neutralize these elements and prepare the pond for fish stocking. This guide will provide a detailed step-by-step process on how to effectively treat your pond.
1. Understanding the Importance of Concrete Pond Treatment
Before we delve into how to treat new concrete pond steps, let’s explore why this process is critical:
– High pH Levels: Fresh concrete naturally has a high pH due to the presence of calcium hydroxide. High alkalinity can be harmful to fish, causing stress or even death.
– Chemical Leaching: Uncured concrete can release chemicals such as lime (calcium oxide) into the water, which can raise the pH level and make the water unsuitable for fish.
– Construction Residues: Cement and other construction materials can leave behind residues that contaminate the water, potentially causing toxicity.
2. Detailed Steps to Prepare a New Concrete Pond
Step 1: Initial Cleaning of the Pond
Purpose: The initial cleaning removes debris, dust, and loose cement particles that could contaminate the water or harm fish.
Detailed Procedure
1. Remove Debris and Residues: Start by manually removing any large debris such as pieces of wood, plastic, or cement left over from construction. This prevents these materials from contaminating the water.
2. Rinse the Pond with Fresh Water: Use a high-pressure hose to thoroughly rinse the entire interior surface of the pond, including the walls and the bottom.
Focus on corners and edges where dust and debris tend to accumulate. This step is essential to wash away loose particles and residues that could raise the water’s pH level or introduce toxins.
3. Scrub with a Stiff Brush: After rinsing, scrub the surfaces with a stiff-bristled brush to dislodge any stuck-on cement particles or grime. This is especially important for newly constructed ponds where cement residue may still be present.
4. Drain the Pond Completely: Once scrubbing is complete, drain all the rinse water from the pond. This water may contain high levels of pH level and construction residue, so it is essential to remove it completely before proceeding to the next steps.
Safety Tips: Wear protective gloves, goggles, and a mask to avoid contact with dust and chemical residues. Ensure you work in a well-ventilated area to avoid inhaling dust particles.
Step 2: Neutralizing Alkalinity and Removing Lime
Purpose: Neutralizing the pond water’s pH level and removing lime are vital to prevent chemical burns on fish and ensure the water is habitable.
Detailed Procedure
1. Fill the Pond with Fresh Water: After the initial cleaning, fill the pond with fresh, clean water up to its intended operational level. This water will act as a medium to dilute the alkalinity of the concrete.
2. Add Acidic Substances to Neutralize the pH
– Vinegar Method: If using vinegar, add approximately 2 liters of vinegar per 1000 liters of pond water. Vinegar is a mild acid that helps to lower the pH gradually without harming the concrete structure.
– Muriatic Acid Method: For quicker results, use muriatic acid. Carefully add 50 ml of muriatic acid per 1000 liters of water. Muriatic acid is stronger and more effective at quickly lowering the pH but requires careful handling due to its corrosive nature.
3. Monitor pH Levels Regularly: Use a reliable pH testing kit to monitor the pH level of the water. The goal is to bring the pH level down to a neutral range (6.5 to 7.5). It is crucial to test the water several times over a 24-hour period, as the pH can fluctuate.
4. Drain and Refill the Pond: After 24 hours, drain the pond completely to remove water that contains neutralized lime and other substances. Refill the pond with fresh water and repeat the acid treatment and pH monitoring steps as needed until the water maintains a stable, neutral pH.
5. Safety Precautions When Handling Acids: Always wear protective gloves, goggles, and a mask when handling acidic substances like muriatic acid. Work in a well-ventilated area and follow all safety instructions provided by the manufacturer.
Why This Step is Crucial: Neutralizing the pH is essential to prevent any chemical burns or stress on the fish. Fish thrive in water with a stable pH; sudden changes can lead to shock, increased susceptibility to diseases, and even mortality.
Step 3: Curing the Concrete
Purpose: To allow the concrete to set fully and stabilize, ensuring all lime and harmful compounds are leached out.
Detailed Procedure:
1. Refill the Pond with Fresh Water: After achieving a neutral pH from the previous step, refill the pond with fresh water to its usual level. This time, allow the water to remain in the pond for a longer period, typically about one or two weeks.
2. Monitor pH and Water Hardness: Use a pH meter and a hardness test kit to check the water’s pH and hardness levels daily. The pH should remain stable between 6.5 and 7.5, and hardness should be at a safe level for fish (50-150 ppm). If pH levels rise above 7.5 or hardness increases significantly, drain the pond and refill with fresh water.
3. Drain and Repeat as Needed: Continue this process of filling, monitoring, and draining until the water maintains stable pH and hardness levels for at least one week. This indicates that the concrete has cured properly and is no longer leaching harmful substances into the water.
4. Drying the Pond: After the curing period, drain the pond completely and allow it to dry. This further ensures any remaining chemical traces evaporate or neutralize.
Importance of Curing: Curing is a critical step in the preparation process. It allows the concrete to reach its full strength and durability while ensuring that any remaining lime or chemical residues are leached out, making the pond safe for fish.

Step 4: Final Cleaning and Preparing for Stocking
Purpose: To ensure the pond is completely free of harmful chemicals and residues and ready for fish stocking.
Detailed Procedure:
1. Perform a Thorough Rinse: Once the pond has dried, perform another thorough rinse with fresh water using a high-pressure hose. Pay special attention to corners and surfaces where residues may accumulate. This final rinse removes any remaining acid or neutralized chemicals from the pond surface.
2. Check for Chemical Smell or Residue: After rinsing, carefully check for any lingering chemical smell or residue. If you detect any chemical odors, repeat the rinsing process until the pond is odor-free.
3. Drying Before Stocking: Allow the pond to dry completely once more. This ensures any remaining moisture, which may still contain minor chemical traces, is eliminated before introducing fish.
4. Water Quality Testing: Before filling the pond for the final time, use a water testing kit to test for pH, ammonia, nitrite, and nitrate levels. Ensure that the water parameters are within the safe range for fish health:
– pH: 6.5-7.5
– Ammonia: 0 ppm
– Nitrite: 0 ppm
– Nitrate: Less than 20 ppm
5. Add Dechlorinator if Using Tap Water: If you are using tap water, add a dechlorinator to neutralize any chlorine or chloramine present in the water. Follow the manufacturer’s instructions for the correct dosage. All the above are ways of how to treat new concrete pond
Why Final Cleaning is Important: This last step ensures the pond is not only visually clean but also free of invisible chemical residues that could be harmful to fish. Water quality testing confirms that all parameters are safe, setting the stage for a successful fish stocking.
Step 5: Biological Preparation (Optional but Recommended)
Purpose: To introduce beneficial bacteria that help establish a balanced aquatic ecosystem.
Detailed Procedure
1. Add Organic Material to the Pond
Place organic materials such as hay, straw, or decomposed leaves into the pond. I often use plantain and nim tree leaves. This provides a medium for beneficial bacteria to grow, which is crucial for breaking down organic waste and maintaining a balanced ecosystem.
2. Fill the Pond with Water
Fill the pond with fresh water, ensuring that the organic materials are fully submerged. Allow this setup to sit for a week. The decomposition of organic matter will release nutrients that foster the growth of beneficial bacteria.
3. Monitor Decomposition Process
During this week(s), check the water daily for signs of rapid decomposition, such as foul odors or excessive foam. These can indicate an overabundance of organic matter, which could lead to poor water quality.
4. Remove Decomposed Material and Drain Water
After one week or two, remove the organic material from the pond and drain the water. This step helps eliminate any excess nutrients or organic debris that might cloud the water or deplete oxygen levels.
5. Refill the Pond with Fresh Water
Once you have removed the decomposed organic material and drained the water, refill the pond with fresh, clean water.
This water should now be ready to support a healthy population of fish.
- Bonus tip: With this same procedure of treatment with organic materials, you can also use salt. Just fill the concrete pond with water and add salt. Dissolve the salt and allow it to soak the pond for about a week or two. Drain off the water again and you are ready to go.
6. Introduce Beneficial Bacteria
To further stabilize the water chemistry and create a healthy biological environment, you can introduce a commercial bacterial starter. These bacteria will help break down organic waste and reduce harmful ammonia and nitrite levels, establishing a balanced nitrogen cycle in the pond.
Importance of Biological Preparation: Adding beneficial bacteria helps in creating a mini-ecosystem within the pond. It promotes a natural balance by breaking down waste products, ensuring a safer and more sustainable environment for your fish.
3. Final Preparations Before Stocking Fish
After completing all the steps to treat the newly constructed concrete pond, a few final preparations will ensure everything is set for fish stocking:
a. Ensuring Optimal Water Quality
Check Water Quality Parameters: Conduct a final check of the water quality using a comprehensive test kit. Ensure that pH, ammonia, nitrite, and nitrate levels are within safe ranges.
Any deviation could stress or harm the fish, so it is vital to make adjustments if needed.
Temperature Control: Make sure the water temperature is suitable for the fish species you intend to stock. Gradually adjust the temperature to match the natural environment of the fish to minimize stress during stocking.
b. Aeration and Water Circulation
Install Aeration Systems: Aeration is critical for maintaining oxygen levels, especially in a newly established pond where oxygen demand can fluctuate. Use air pumps, aeration stones, or surface agitators to keep the water well-oxygenated.
Ensure Proper Water Circulation: Good water circulation prevents stagnation, helps distribute oxygen evenly, and promotes a healthy aquatic environment. Ensure that any installed filtration or water circulation systems are operational and effectively moving water throughout the pond.
c. Introducing Fish to the Pond
Acclimatization Process: Before introducing fish directly into the pond, acclimate them by floating their transport bags in the pond water for 15-20 minutes. Gradually mix pond water into the bags to slowly equalize the water temperature and chemistry, reducing the risk of shock.
Stocking Density Considerations: Be mindful of the stocking density, ensuring it is appropriate for the pond size and the species of fish. Overcrowding can lead to stress, competition for resources, and increased disease risk.
Monitor Fish Behavior: After introducing the fish, closely monitor their behavior for signs of stress or discomfort. Indicators such as gasping at the surface, erratic swimming, or lethargy may suggest water quality issues or other stressors that need immediate attention.
Medication/Stress Release: Immediately after stocking, add stress-release medications recommended by your veterinary or fish farming expert. But with local remedies, you can easily add salt to the pond as a stress release. Check out the full article about the importance and how to add salt to fish pond.
Feed Lightly Initially: So don’t just feed them immediately after stocking them. Allow them to rest for about 10 hours. Start with a light feeding schedule to avoid overfeeding, which can degrade water quality quickly. Gradually increase the feed amount as the fish acclimate and become more active.
Important Notice: You notice that I keep mentioning testing water in the post, this indicates how important it is to test your fish pond water to ensure optimal growth and less mortality. To do that, you need the right Water Test Kit or Monitoring Tool.
Conclusion
How to Treat new concrete pond before stocking fish is a meticulous process that ensures the safety and well-being of the fish.
By following these detailed steps—cleaning, neutralizing alkalinity, curing, performing a final cleaning, and biological preparation—you can create a stable and healthy environment for your fish. The key is to be thorough and patient, allowing the pond to stabilize and become a suitable habitat.
Recommendation
Do not take the above information lightly if you truly want success in your fish farming business. I know someone who constructed a concrete fish pond but did not treat it well and lost all his first stock of 700 catfish. He stocked again and lost all the 700 before inviting me to the farm. I myself and my team treated the pond and now his fish is flourishing. Then we also thought him how to treat new concrete pond.
To achieve more success in your fish farm, the best and continued knowledge is paramount.