
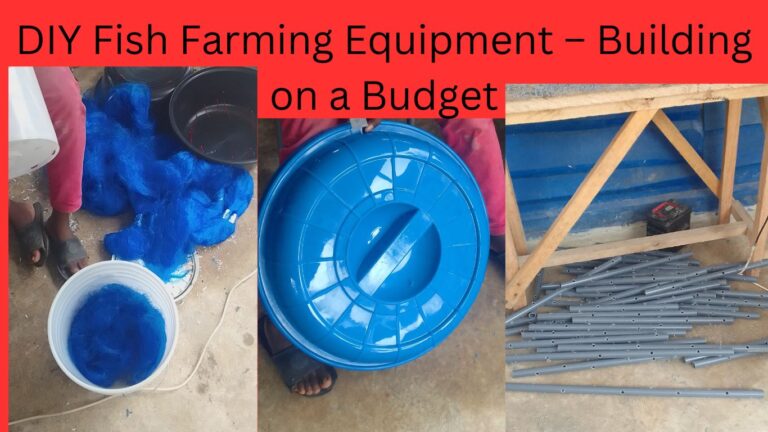
DIY fish farming is a simple way of designing a fish farm by yourself. DIY is an abbreviation that stands for Do-It-Yourself.
Do you intend to dive into DIY fish farming equipment as a fish farmer? If you’ve ever dreamed of having your own fish farm but were discouraged by the high cost of equipment, worry no more.
In this guide, we’ll explore how to build essential fish farming equipment by yourself. This will not only reduce the cost of setting up your fish farm but also give you experience.
Let’s get started!
Importance of DIY Fish Farming
Why choose the DIY fish farming equipment? Well, for starters, it can save you a lot of money. Commercial equipment can be costly, and if you’re on a low budget, it might seem out of reach.
But fear not! With a little creativity and some basic tools, you can make your own fish farming equipment to reduce costs. Plus, DIY projects can be fun and rewarding, allowing you to customize your equipment to suit your specific needs.
1. Pond Construction
Pond construction is the foundational step in setting up your fish farm. It involves creating a suitable environment for fish to live in, including proper water depth, substrate, and structure.
Fish ponds come in different forms, it could be tarpaulin, concrete, earthen, plastic, or glass. Check out more on Types of Fish Pond.
Depending on the fish pond type, there are several ways of constructing a fish pond with DIY fish farming equipment.

Materials for Plastic Pond
– Pond liner or heavy-duty plastic sheeting This forms the waterproof barrier that prevents water from seeping into the soil.
– Shovel: Used for digging the pond hole.
– Gravel: Provides a substrate for the pond bottom.
– Rocks: Used for edging and securing the pond liner.
– Water pump (optional): Helps in filling the pond if there’s no natural water source nearby.
Materials for Tarpaulin Fish Pond
– Tarpaulin liner: To serve as a liner to keep or hold water.
– PVC pipes or Metal Pipes: These serve as frame stands to hold the tarpaulin
Materials for Concrete Fish Pond for DIY Fish Farming
– Cement: For laying blocks/bricks and construction of walls
– Sea Sand/Gravel/Aggregate: used for construction of walls, casting of concrete, and flooring the floor.
Steps for DIY Fish Pond Construction
1. Choose a Location
Select a suitable location for your pond. It should have enough sunlight and access to water. But excess sunlight is also dangerous. So choose a favorable climate since climate variation has impact in the operations of fish farming.
Also, consider a good drainage place for any type of fish pond.
2. Dig the Hole
Use a shovel to dig the pond hole. The size and depth of the pond depend on the fish species you plan to raise and the available space. Typically, the depth ranges from 3 to 6 feet. It’s essential to create shelves or varying depths within the pond to accommodate different fish species’ needs. This is for an earthen pond. However, the same measurement can be applied to other ponds.
3. Line the Pond
Once the hole is dug, line it with a pond liner or heavy-duty plastic sheeting. Ensure there are no wrinkles or folds in the liner, as this can cause leaks. Trim off any excess material.
If it’s plastic or tarpaulin pond, you just erect it. It can come in any shape or form but the common ones are circular, rectangular, and square.
4. Add Gravel and Rocks
Place gravel along the bottom of the pond to provide a substrate for beneficial bacteria and aquatic plants. This helps maintain water quality and provides a habitat for small organisms that fish may feed on.
Use rocks to secure the edges of the pond liner and create a natural-looking border. It also serves as a hidden place for the fish.
5. Fill with Water
If you have a natural water source nearby, you can fill the pond using hoses or pipes. Otherwise, you may need to use a water pump to fill it.
Before you add fish, let the water sit for a few days to allow any chlorine to dissipate and the water temperature to stabilize especially if you are using Metropolitan Water Supply System.
There are better water source options such as underground water, rivers, dams, and others. Check out more in this post.
2. Filtration System
A good filtration system is essential for maintaining water quality and keeping your fish healthy.
The filtration system is a system that removes the insoluble particles or harmful chemicals from the fish pond making it good habitat for the fish.
Let’s look at how to build one on a low-budget
Materials for Filtration System In DIY Fish Farming
– Plastic barrels or buckets: These will serve as the main chambers for your filtration system.
– PVC pipes: You’ll need these to create a water flow system. You can also call it Moving Bed Biofilter (MBB)
– Aquarium filter media: This includes items like bio balls or filter sponges, which will remove debris and waste from the water.
– Water pump: The pump will circulate water through the filtration system.
– Tubing: This will connect the pump to the filtration system.
– Silicone sealant: This will be used to seal any connections and prevent leaks.
Steps In Making a Filtration System
1. Build the Filter Chambers
– Cut holes in your barrels or buckets to create compartments for the filter media. You can use a hole saw or a jigsaw for this purpose.
– You’ll want to have at least two chambers: one for mechanical filtration (to remove large debris) and one for biological filtration (to promote the growth of beneficial bacteria).
2. Arrange the Pipes
– Connect PVC pipes to create a water flow system. You’ll need an inlet pipe to bring water into the filtration system and an outlet pipe to return filtered water to the pond.
– Ensure that water passes through each filter chamber in sequence, starting with mechanical filtration and ending with biological filtration.
– perforate the PVC pipes with small holes to collect the insoluble particles and pass it through the outlet.
3. Add Filter Media
– Fill each chamber with your chosen filter media. Mechanical filtration chambers can be filled with coarse filter pads or sponges to trap large particles. Biological filtration chambers should be filled with porous media like bio balls or ceramic rings.
– The biological filtration media provides a large surface area for beneficial bacteria to colonize. These bacteria break down harmful ammonia and nitrites into less harmful nitrates.
4. Connect the Pump
– Use tubing to connect the water pump to the filtration system. The pump should be placed in the pond or a separate sump tank.
– Ensure that water is pumped from the pond into the mechanical filtration chamber, then through the biological filtration chamber, and finally back into the pond.
5. Seal and Test
– Use silicone sealant to seal any connections and prevent leaks.
– Test the filtration system by turning on the pump and observing water flow through each chamber. Make adjustments as needed to ensure proper circulation and filtration.
How it Operates
The filtration system operates by cycling water through different chambers, each with its own function. And you can simple DIY fish farming
– Mechanical Filtration: The first chamber removes large debris and suspended particles from the water.
This prevents them from clogging the biological filtration media and ensures that water entering the next chamber is relatively clean.
– Biological Filtration: In this chamber, beneficial bacteria colonize the surface of the filter media.
These bacteria break down harmful ammonia and nitrites produced by fish waste and uneaten food, converting them into less toxic nitrates.
– Water Pump: The water pump circulates water through the filtration system, ensuring that all the water in the pond passes through the filter media.
This helps maintain water quality and provides oxygenation for the fish. Check out how the RAS works
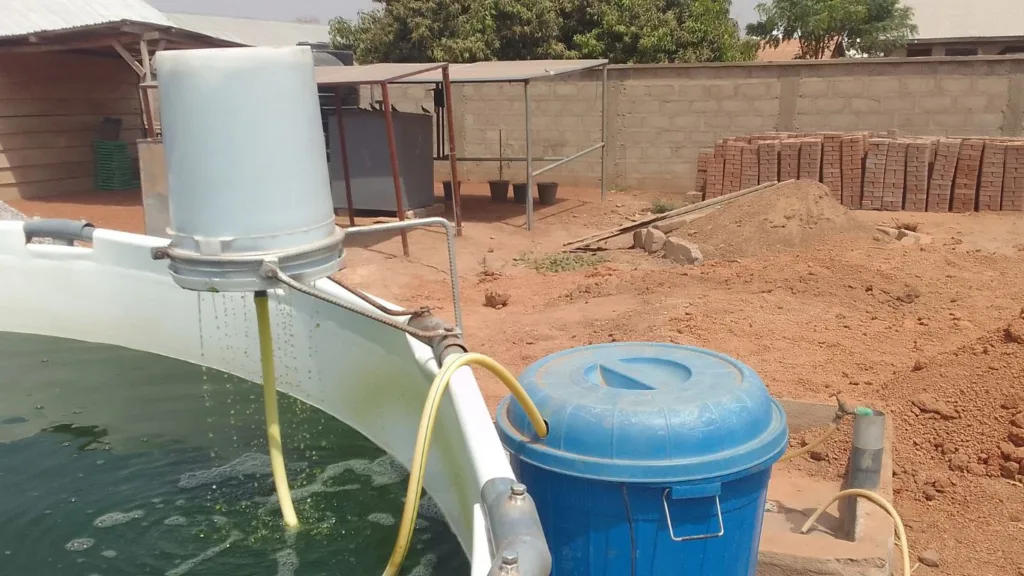
3. Aeration System
An aeration system is one of the DIY fish farming equipment.
Fish need oxygen to survive, and aeration systems are essential for maintaining healthy oxygen levels in your fish farm.
Aeration systems operate by introducing air into the water, which increases oxygen levels and helps remove harmful gases like carbon dioxide.
Here’s a detailed explanation of how an aeration system works and how to set one by DIY fish farming method.
Materials
– Air pump
– Air stones or diffusers
– Tubing
How it Works
1. Air Pump: The heart of the aeration system is the air pump.
This pump draws in air from the atmosphere and delivers it to the water in your pond.
2. Tubing: Tubing is used to transport the air from the pump to the pond.
It’s important to use tubing that is sturdy and won’t kink or collapse, as this can restrict airflow.
3. Air Stones or Diffusers: Once the air reaches the pond, it’s dispersed into the water through air stones or diffusers.
These devices create small bubbles that rise to the surface, increasing the surface area of the water in contact with the air.
4. Oxygenation: As the bubbles rise to the surface, they release oxygen into the water and create agitation, which helps distribute oxygen throughout the pond.
This process is known as oxygenation.
5. Gas Exchange: In addition to adding oxygen, aeration systems facilitate gas exchange by allowing carbon dioxide and other gases to escape from the water into the atmosphere.
This helps maintain proper water chemistry and prevents the buildup of harmful gases.
Setting Up the Aeration System
1. Choose the Right Location: Place the air pump in a dry, well-ventilated area near your pond. It should be protected from the elements to prevent damage.
2. Connect the Tubing: Attach one end of the tubing to the outlet of the air pump. Run the tubing along the ground or secure it to a wall using clips or hooks to prevent tripping hazards.
3. Install the Air Stones or Diffusers: Place the air stones or diffusers at the bottom of the pond. You can weigh them down with rocks to keep them in place. Spread them out evenly to ensure proper distribution of bubbles throughout the pond.
4. Test the System: Once everything is set up, turn on the air pump and observe the bubbles rising to the surface of the water. Adjust the airflow as needed to achieve the desired level of aeration.
Note: Some oxygen pumps are submersible, which means they work in water. In that case, the pump needs to be inserted into the fish pond. You then connect the turbine tube to it to pull in the air.
Operation
– Continuous Operation: For most fish farms, it’s best to run the aeration system continuously to ensure a consistent supply of oxygen to the fish. This is especially important during hot weather or when stocking high densities of fish.
– Monitoring: Keep an eye on the bubbles produced by the aeration system.
If you notice a decrease in bubble production or a decrease in water quality, it may indicate a problem with the system that needs to be addressed.
From my personal experience, I realize that when the bubbles decrease or stop producing at all coupled with a change in the watercolor, it means the ammonia level in the water is high.
In that case, measures should be taken to correct that otherwise, you may get high Fish Mortality.
– Maintenance: Regular maintenance is essential to keep the aeration system running smoothly.
This includes cleaning the air stones or diffusers periodically to remove any buildup of algae or debris that could restrict airflow.
4. Feeding and Harvesting Tools
When it comes to managing your fish farm, having the right tools for feeding and harvesting is essential.
Let’s dive into how to set up your feeding and harvesting equipment and how they operate.
Materials
– PVC pipe
– Fish feeders
– Nets
– Buckets
Feeding Tools
Feeding your fish regularly is crucial for their growth and overall health. Here’s how to create a simple yet effective DIY fish feeder:
1. DIY Fish Feeder:
– Materials Needed: PVC pipe, end caps, drill, fish feed
– Steps
1. Prepare the PVC Pipe: Cut the length of the PVC pipe to the desired size for your feeder. A length of around 2 to 3 feet works well.
2. Attach End Caps: Seal one end of the PVC pipe with an end cap using PVC glue or silicone sealant.
3. Drill Holes: Using a drill, create small holes along the length of the PVC pipe. These holes will allow the fish feed to slowly trickle out.
4. Fill with Fish Feed: Once the holes are drilled, fill the PVC pipe with your chosen fish feed.
5. Mount Near the Pond: Attach the feeder to a sturdy post or railing near the pond’s edge. Ensure it’s positioned above the water surface but within reach of the fish.
Operation
As the fish feeder is mounted near the pond, gravity pulls the fish feed down through the holes in the PVC pipe.
Fish can swim up and nibble at the feed as needed, ensuring a steady supply of food throughout the day.
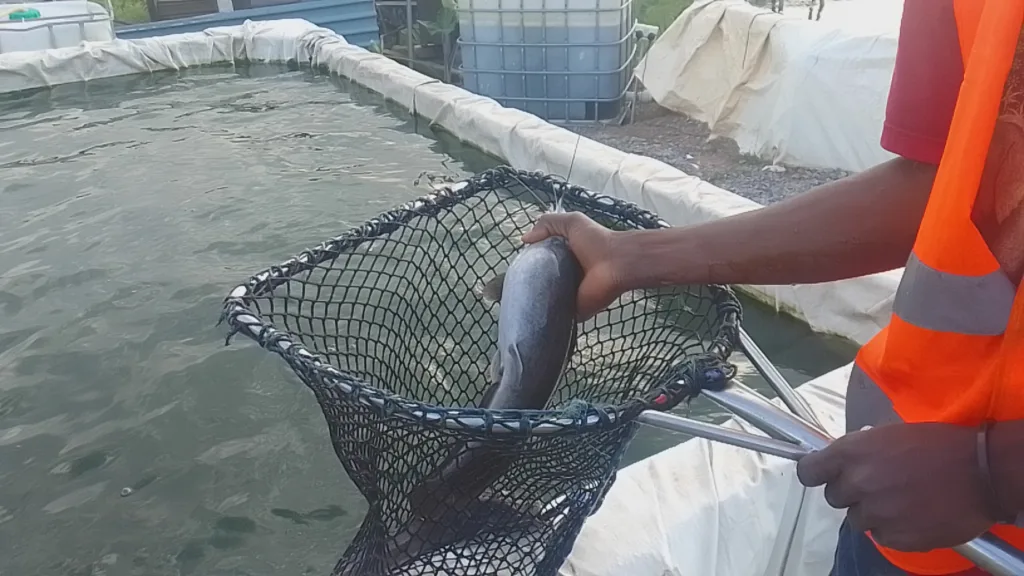
Harvesting Tools
Harvesting your fish is an exciting part of fish farming. Here’s how to set up your harvesting tools:
2. Nets
– Materials Needed: Fishing nets with fine mesh
– Steps
1. Choose the Right Net: Select a fishing net with a fine mesh to avoid injuring the fish during handling.
2. Position the Net: When it’s time to harvest, slowly move the net through the water to corral the fish towards one end of the pond.
3. Scoop Up the Fish: Once the fish are gathered, carefully scoop them up with the net, making sure not to overcrowd them.
4. Transfer to Buckets: Transfer the captured fish to clean buckets filled with water for transport.
Operation of Harvesting Tool
The net is used to gently corral and capture the fish without causing them harm. By scooping them up and transferring them to buckets, you can safely transport them to their new destination, whether it’s a market, a processing facility, or another pond.
3. Buckets
– Materials Needed: Clean buckets
– Steps
1. Prepare the Buckets: Ensure the buckets are clean and free of any contaminants that could harm the fish.
2. Fill with Water: Fill the buckets with water from the pond to keep the fish moist and comfortable during transport.
3. Transfer the Fish: Carefully transfer the harvested fish into the buckets, taking care not to overcrowd them.
Operation
Buckets are used as temporary holding containers for transporting the harvested fish.
By keeping them filled with pond water, you maintain a suitable environment for the fish until they reach their destination.
Conclusion
Congratulations! You’ve just built your very own DIY fish farming equipment on a low budget. With your homemade pond, filtration system, aeration setup, and feeding/harvesting tools, you’re well on your way to becoming a successful fish farmer without breaking the bank. Remember, the key is to get creative and have fun with your projects.
Recommendations
To be successful in your DIY fish farming equipment, you may also seek fish farming experts advice and recommendations. Since “Experience is the best teacher”, they have been in the system for a long. There is no doubt that they have accumulated experience and can therefore guide you. Check out The Best 8 Aquaculture Experts for your professional advice.
Please leave a comment below if you found this post useful.

I needed to thank you for this wonderful read!! I absolutely enjoyed every little bit of it. I have got you saved as a favorite to check out new things you post…
Good info. Lucky me I ran across your blog by chance (stumbleupon). I’ve book marked it for later!
When I initially commented I seem to have clicked the -Notify me when new comments are added- checkbox and now every time a comment is added I receive 4 emails with the exact same comment. There has to be a way you can remove me from that service? Thanks a lot.
Howdy! I could have sworn I’ve been to this web site before but after going through many of the posts I realized it’s new to me. Regardless, I’m certainly happy I found it and I’ll be bookmarking it and checking back often!
Thanks
Hi, I do believe your website could possibly be having web browser compatibility issues. When I look at your blog in Safari, it looks fine but when opening in Internet Explorer, it has some overlapping issues. I merely wanted to provide you with a quick heads up! Apart from that, great website!
Right here is the right web site for anybody who would like to find out about this topic. You know a whole lot its almost hard to argue with you (not that I actually would want to…HaHa). You definitely put a brand new spin on a subject that has been discussed for years. Excellent stuff, just wonderful.
I really love your website.. Pleasant colors & theme. Did you build this website yourself? Please reply back as I’m attempting to create my own personal site and would love to know where you got this from or exactly what the theme is named. Appreciate it.
You should take part in a contest for one of the finest blogs online. I will recommend this website!
This is a good tip particularly to those new to the blogosphere. Short but very accurate info… Thanks for sharing this one. A must read article!
Good day! I simply want to give you a big thumbs up for the great info you have here on this post. I am coming back to your web site for more soon.
Hi there i am kavin, its my first occasion to commenting anyplace, when i rread this article
i thought i could also make comkment due to this sensible paragraph. https://Www.waste-ndc.pro/community/profile/tressa79906983/
May I simply say what a relief to discover an individual who actually understands what they are talking about online. You actually know how to bring a problem to light and make it important. More people ought to check this out and understand this side of the story. I can’t believe you’re not more popular given that you certainly possess the gift.
Very great post I just stumbled upon your weblog and wished to mention that I have really enjoyedsurfing around your weblog posts In any case I will be subscribing to your feed and I hopeyou write again very soon!
Oh my goodness! Amazing article dude! Thank you so much, However I am experiencing problems
with your RSS. I don’t know why I am unable to subscribe to it.
Is there anybody having similar RSS problems?
Anyone that knows the answer can you kindly respond?
Thanks!!
Great info and right to the point. I don’t know if this is truly the best
place to ask but do you folks have any ideea where to employ some professional writers?
Thank you 🙂 Najlepsze escape roomy
Hello I am so glad I found your site, I really found you by
error, while I was searching on Yahoo for something
else, Regardless I am here now and would just like to say thanks a
lot for a fantastic post and a all round enjoyable blog (I
also love the theme/design), I don’t have time to look over it all at the moment but
I have saved it and also included your RSS feeds, so when I have
time I will be back to read a lot more, Please do keep up the superb jo.